October 20, 2026
How to Follow Up on a Quote and Close More Cleaning Sales
Learn how to follow up on a quote with timing, templates, and tactics that turn estimates into booked cleaning jobs. Practical advice for cleaning businesses.

Wednesday, October 21, 2026
How to make before after photos. Learn how to make before and after photos that document cleaning credibly, support estimates, and stand out

You finish a bathroom deep clean, pull out your phone, and the after photo looks almost too good. The light's brighter, the towel's straight, and the bin that sat by the toilet is suddenly gone. The customer sees the pair and wonders what you cleaned and what you just moved. That's the problem most cleaning businesses face when they're learning how to make before after photos that genuinely prove the work. The fix isn't a better filter. It's a repeatable routine.
A cleaner photographs a dim bathroom on arrival, then opens the shower curtain, moves the trash bin, straightens the towels, and raises the exposure for the second shot. The tile hasn't just been cleaned. The whole scene has changed. Customers notice that mismatch, even when they can't name it, and a photo meant to build confidence starts creating doubt instead.
A credible comparison keeps the room recognizable. The door edge, vanity, and floor lines sit in the same place, so the only obvious difference is the condition of the surfaces you serviced. That discipline matters more in cleaning than many guides admit, because staging tricks are easy here. Opening curtains, rearranging furniture, or shooting only the best corner can make an ordinary result look dramatic, a gap that cleaning-specific photo guidance on consistent framing helps expose.
Browsing our recent restoration projects from AMPM Restoration Services gives you a useful reference for how documented transformations can communicate scope without relying on one glamorous angle. Apply that same evidence mindset to recurring cleans. When a prospect asks why a deep clean costs more than a standard visit, a standardized bathroom set explains the starting condition and suitable add-ons far better than a single bright after image. You're not selling shine. You're showing verifiable work, and that's what makes someone comfortable booking.
Preparation decides whether your pair is comparable before anyone picks up a spray bottle. Start with the simplest kit your team will reproduce on every job, not the most impressive one. A dependable phone, a small tripod or fixed support, a microfiber cloth for the lens, enough free storage, and one optional diffused light will handle most residential work.
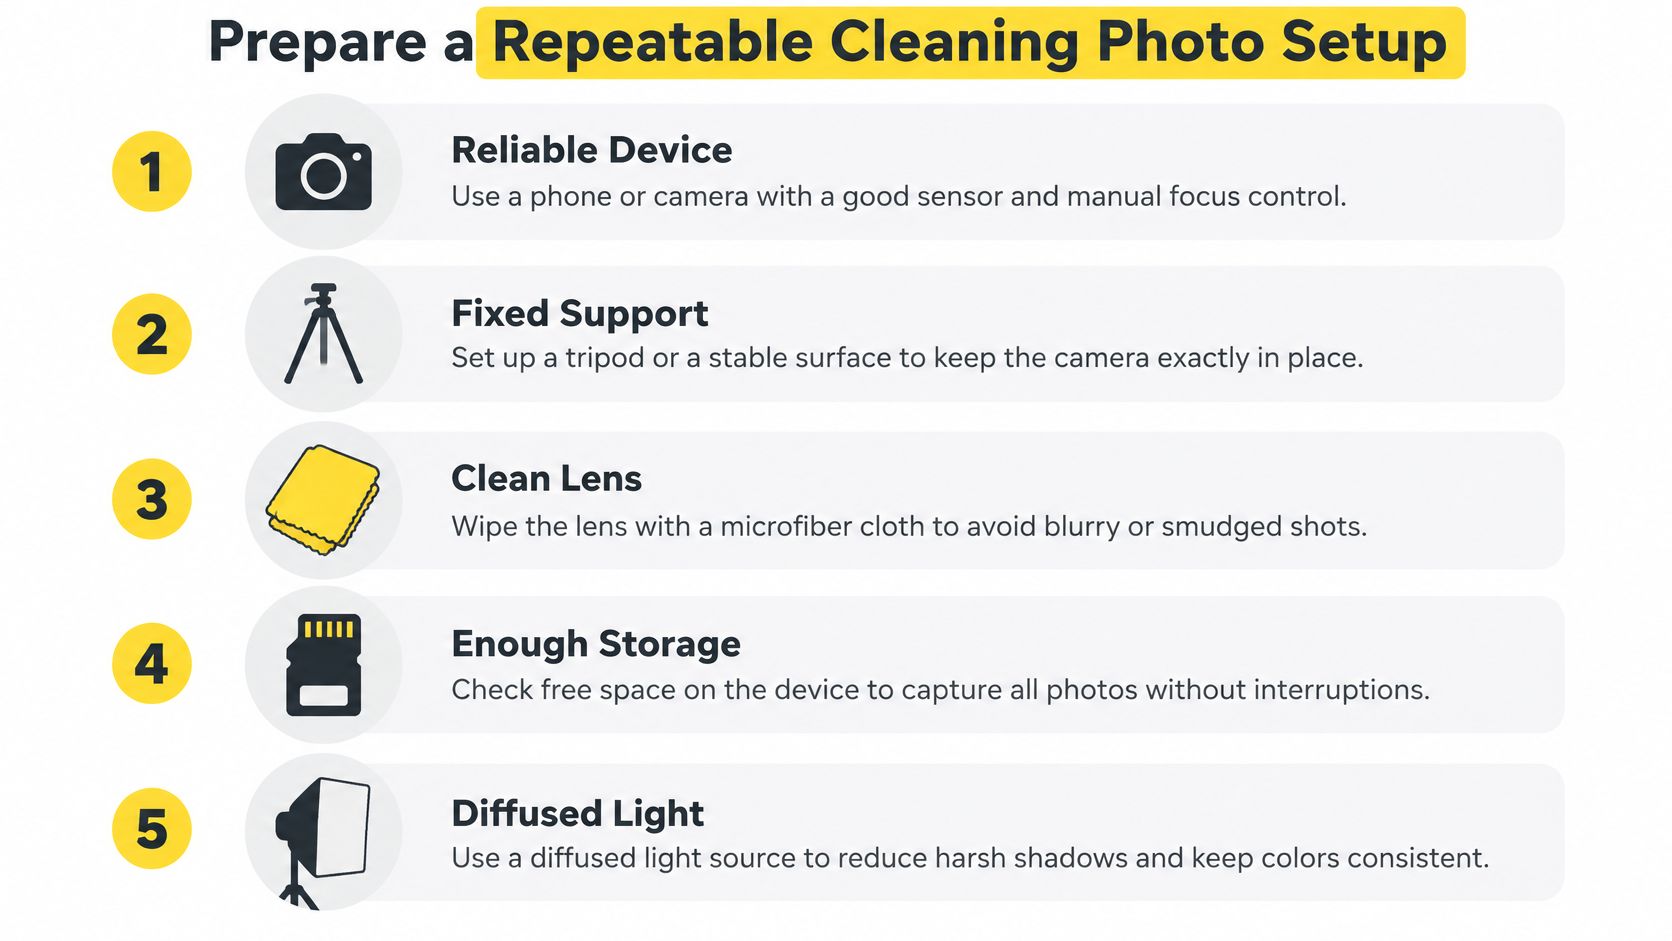
Walk the home first and agree on room boundaries and capture order. A fixed sequence such as entry, kitchen, bathroom, and high-touch surfaces prevents missed rooms and mismatched files later. That order fits neatly into a cleaning schedule checklist your team already follows, so photography becomes part of the visit rather than an afterthought. Mark the camera position with painter's tape on the floor, note the height, and decide which furniture stays exactly where it is.
Clean the lens, then turn off beauty smoothing and HDR so the phone doesn't brighten one image more than the other. Tap and hold on the subject to lock focus and exposure, and keep the same white balance setting for both shots, an approach supported by smartphone guidance on locking focus and exposure. Consistent views captured in the same sequence each time remove variables that make changes look larger than they are, as professional guidance on fixed before and after views makes clear.
Ask for permission before you shoot, and agree on what stays out of frame, including people, mail, and personal items. Decide file names in advance, such as address, room, and before or after. Above all, don't tidy beyond what the service normally includes just to hide the starting condition. You're documenting the job the customer bought, not manufacturing a larger transformation. If the setup takes more than a couple of minutes, simplify it until a solo cleaner can repeat it under time pressure.
Start every room with a wide establishing frame. It shows layout, scope, and the surfaces included in the visit, which helps later when someone asks whether baseboards, appliance fronts, or shower glass were part of the job. Then work through the same zones in the same order for both rounds.
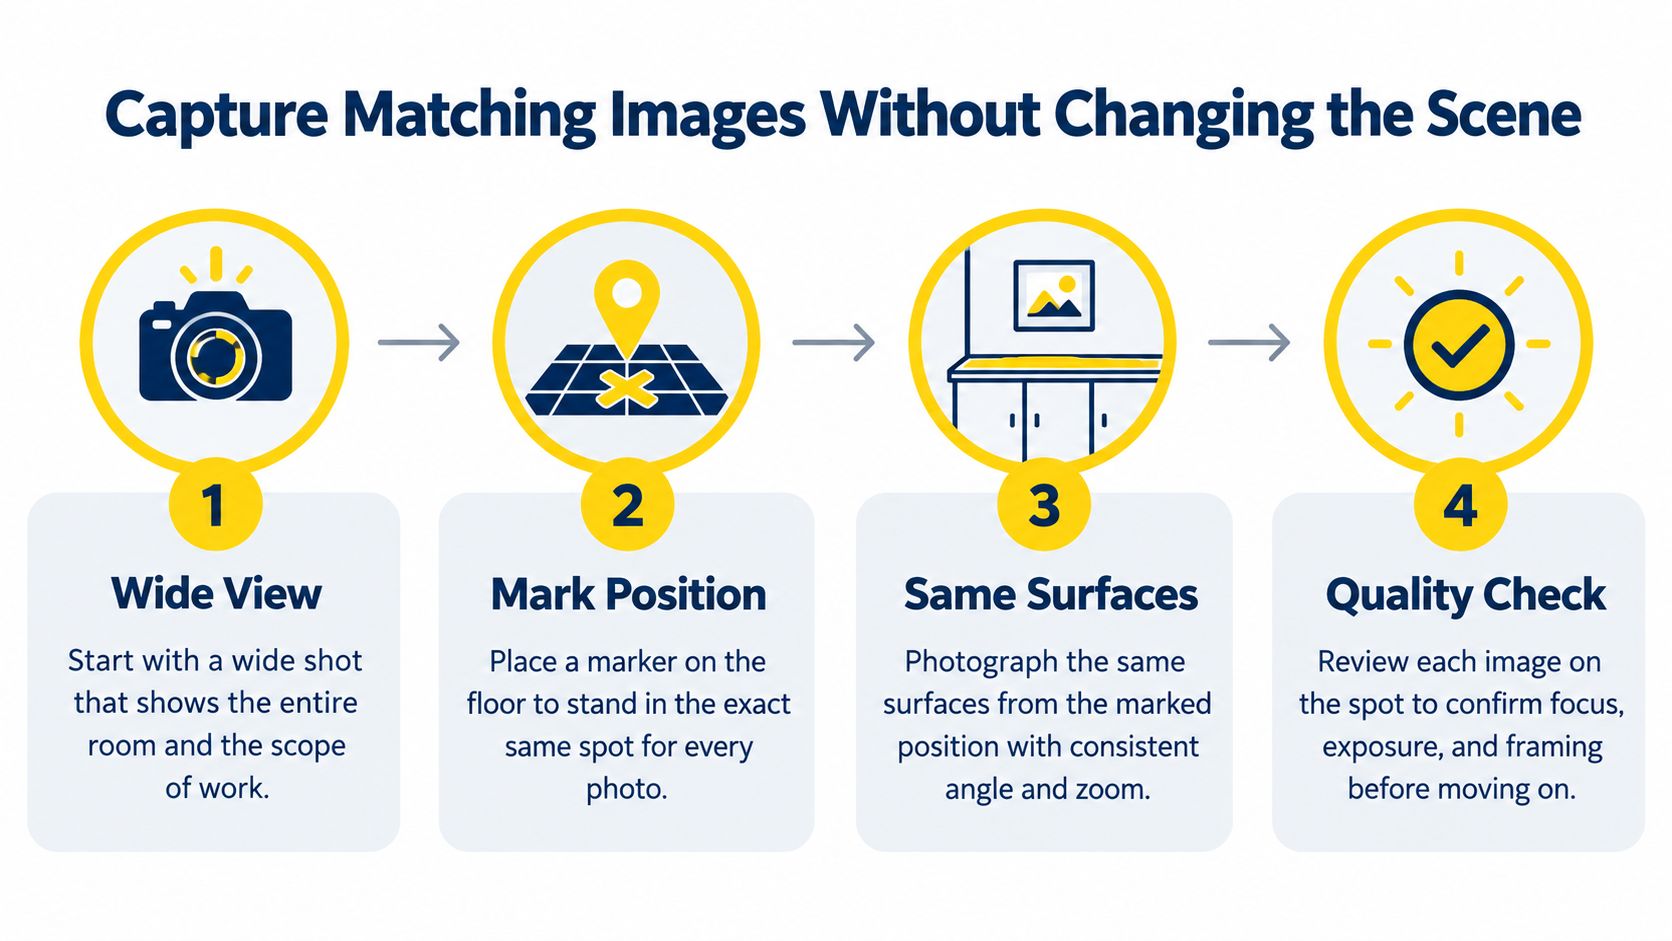
Stand on your floor marker for the after shot and match height, distance, orientation, lens setting, and viewing angle. Don't switch to the ultra-wide lens because the room looks bigger, and don't step closer to crop out a missed corner. Expert protocols require constant distance, angle, background, and preparation, and a practical field test is whether the two frames align when overlaid at approximately 50% opacity, as described in professional before and after photo protocols. If they don't align, retake the image while you're still there.
Close-ups earn their place when they document a promised outcome. Shoot grout lines, faucet bases, stovetop edges, floor corners, and specific stains you treated. Skip the dramatic close-up that only exists because it looks impressive. In a move-out clean, that might mean oven glass and bathroom fixtures. In a recurring deep clean, it might mean kitchen floor edges and high-touch handles.
Keep surface conditions comparable too. A wet floor reflects light and looks cleaner than a dry one, so wait until it dries or note the difference. Leave furniture and background objects where they were unless moving them was part of the service, and disclose it if you did. That honesty supports better conversations later, especially when photos inform how you estimate cleaning jobs for similar homes.
Before you leave, add a timestamp or elapsed-time note and a room label to each set. Zoom in and check focus, cropped edges, and anything personal that slipped into frame. This quick review is cheap insurance. A missing before shot can't be recreated after the room's clean, and a mismatched angle turns good work into an argument you didn't need.
Lighting is where honest photos most often go wrong. Shoot the before image under a warm, dim bathroom bulb, then open the blinds for the after image, and the room looks cleaner before anyone judges the tile. The cleaner didn't fake the work, but the comparison still exaggerates it.
That risk isn't theoretical. A 2021 analysis of 291 highly engaged Instagram before-and-after posts assessed 16 forms of photographic bias and reported that 97% of posts favored the after result photographically, while a 2023 analysis of 161 image pairs found measurable manipulation in 70.8% of pairs, according to research on photographic bias in before and after imagery. Those studies cover facial procedures, but the lesson transfers directly. Angle, background, and light can create apparent improvement when the underlying result hasn't changed.
Close the blinds or leave them open, but do the same thing both times. Turn decorative lamps off if they cast a warm pool in one shot, and rely on the overhead light you'll have for the return photo. If you bring lights, daylight-balanced illumination around 5000 to 5500 K with two diffused LED panels at roughly 45 degrees gives you a repeatable setup. Adobe identifies approximately 5600 K as standard for outdoor natural light and 3200 K for tungsten interiors in its white balance guidance, which shows why mixing window light with warm bulbs shifts color so much.
A cooler, brighter after image beside a warm, dim before image doesn't prove a cleaner room. It proves you changed the light.
Watch glossy counters and chrome for flash hotspots, and protect bright tile from clipping into featureless white. Photograph a neutral gray or white card at the start of a session when color accuracy matters, especially on stone or light grout. You don't need a clinic setup. You need the same source, same direction, and same exposure closely enough that a customer judges the cleaning, not your lighting choices.
Editing should make a pair easier to read, not easier to sell under false pretenses. Digital tools made this workflow practical, since Adobe released the first version of Photoshop in 1990, helping establish capture, alignment, cropping, and labeling as a digital process, as noted in this history of photography and digital imaging. That same history carries a warning. Tools that align a pair in seconds can also erase the very condition you were hired to fix.
Start by selecting files from the same room, angle, and surface. Crop both identically, straighten them to the same horizon, and set matching dimensions. Apply only global corrections such as modest exposure or white balance adjustment across the whole frame. Place the pair side by side with a clear divider, then add the room label and date or elapsed time.
Make the comparison easier to understand without making the result look different.
That restraint has a business reason. Advertising imagery needs a reasonable basis for the claims it communicates, and the Federal Trade Commission expects support to match what reasonable consumers take from an ad, as set out in the FTC advertising substantiation policy. One dramatic pair shouldn't imply every home gets the same outcome.
Finish with two reviews. First, compare the edited pair against the originals and confirm nothing material changed. Second, read the caption as a customer would and check that room type, scope, and limits are clear. If either review fails, publish the plainer version or don't publish at all.
Most cleaning businesses don't have an equipment problem. They have a consistency problem that new gear won't fix. A current phone with manual focus and exposure lock, used the same way every time, beats a dedicated camera that three employees operate differently. Buy for repeatability first, then upgrade only when reviews show a real gap, such as dark bathrooms or mixed devices rendering color inconsistently.
| Business Type | Practical Setup | Main Priority | Useful Upgrade |
|---|---|---|---|
| Solo cleaner | Phone, mini tripod, lens cloth | Fast, repeatable routine | One diffused LED panel |
| Small residential team | Shared phone settings, floor markers, shared storage | Same sequence across staff | Second panel and gray card |
| Multi-location operator | Standard naming, central originals archive, approval step | Comparable files across crews | Dedicated camera for problem rooms |
Mixed-brand teams need shared rules more than identical hardware. Agree on orientation, room order, capture scale, and who approves pairs before they're sent to customers. Keep that kit with the rest of your field gear, alongside a standard cleaning supplies list, so nobody improvises with a personal phone and different settings.
Store originals in one shared location with standardized names, not scattered across personal camera rolls. That's what protects you when a phone is replaced or software changes how images render. The right setup is the one your least technical team member can reproduce on a busy Friday.
Before sending anything, compare the pair one last time. Check that no unrelated staging entered the frame, the caption names the room and scope, and the originals are saved with clear labels. Then attach the relevant set to your estimates follow-up by SMS or email, so the customer sees the starting condition behind the price and any add-on you're recommending.
Get permission before publishing private interiors, and explain exactly where images will appear. Keep a record of that consent, remove addresses and identifying details, and check metadata before posting. Honest captions matter too. Note that a pair shows one job and one room type, and use relevant background reading, whether that is social media content ideas for cleaning businesses, further material at the Estimatty blog, or hiring and training context for new photo standards at the PipeHire blog. For surface-specific questions that affect what a photo should document, such as stone care, expert advice from WipesBlog.com is a useful reference to keep with the job file.
Use this delivery checklist every time. Confirm consent, verify alignment, save originals, label the room, state the scope, and send the customer version separately from any marketing crop.
Turn those credible photo pairs into booked work by pairing them with fast, consistent pricing when a prospect reaches out. Estimatty gives cleaning businesses an AI-powered web and voice estimator that captures job details and sends instant estimates by SMS and email, day or night. Visit today, set up your pricing, and let your documented results and your response speed win the job together.